For Christmas 2012, I made simple pendants with driftwood and fresh water pearls (I cut up one of my pearl strings) for my Bible Study girlfriends.

Yesterday for the first time I attempted to drill holes in some of my beach pottery with my regular hand held drill and a Spade bit. It was almost a complete success except for one piece which cracked as I was unable to hold it down properly while drilling.
Here are the things I used:
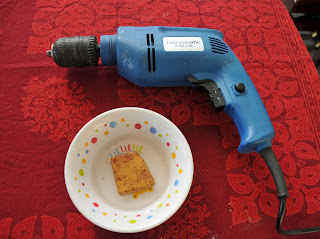
Hand held drill, Plastic bowl and a flat stone

Spade Drill Bit
The steps I followed were:
1. Put the flat stone in the bowl (Initially I tried with a flat piece of wood but it kept floating away). Filled it with water till the stone was immersed.
2. Marked the pottery piece with a pen for where I wanted the hole to be and then placed it on the stone in the bowl and added extra water to just about immerse it.
3. Held the Pottery piece down with a plastic fork and placed the drill on the mark and started drilling at slow speed. Sometimes the Drill bit would wander off the mark and I had to stop and start again.
4. Now and then I changed the water if it became too muddy.
5. Once the hole was made, I flipped the Pottery piece around and drilled it to make the hole bigger, i.e. same size as the front.
Here are the results of my drilling:

Now I just need to learn some wire wrapping skills to make double loops like '8' to fit onto these pendants and chains / leather cords!
Hazel

Yesterday for the first time I attempted to drill holes in some of my beach pottery with my regular hand held drill and a Spade bit. It was almost a complete success except for one piece which cracked as I was unable to hold it down properly while drilling.
Here are the things I used:

Hand held drill, Plastic bowl and a flat stone

The steps I followed were:
1. Put the flat stone in the bowl (Initially I tried with a flat piece of wood but it kept floating away). Filled it with water till the stone was immersed.
2. Marked the pottery piece with a pen for where I wanted the hole to be and then placed it on the stone in the bowl and added extra water to just about immerse it.
3. Held the Pottery piece down with a plastic fork and placed the drill on the mark and started drilling at slow speed. Sometimes the Drill bit would wander off the mark and I had to stop and start again.
4. Now and then I changed the water if it became too muddy.
5. Once the hole was made, I flipped the Pottery piece around and drilled it to make the hole bigger, i.e. same size as the front.
Here are the results of my drilling:

Now I just need to learn some wire wrapping skills to make double loops like '8' to fit onto these pendants and chains / leather cords!
Hazel
No comments:
Post a Comment